Attacking Article: The Switch
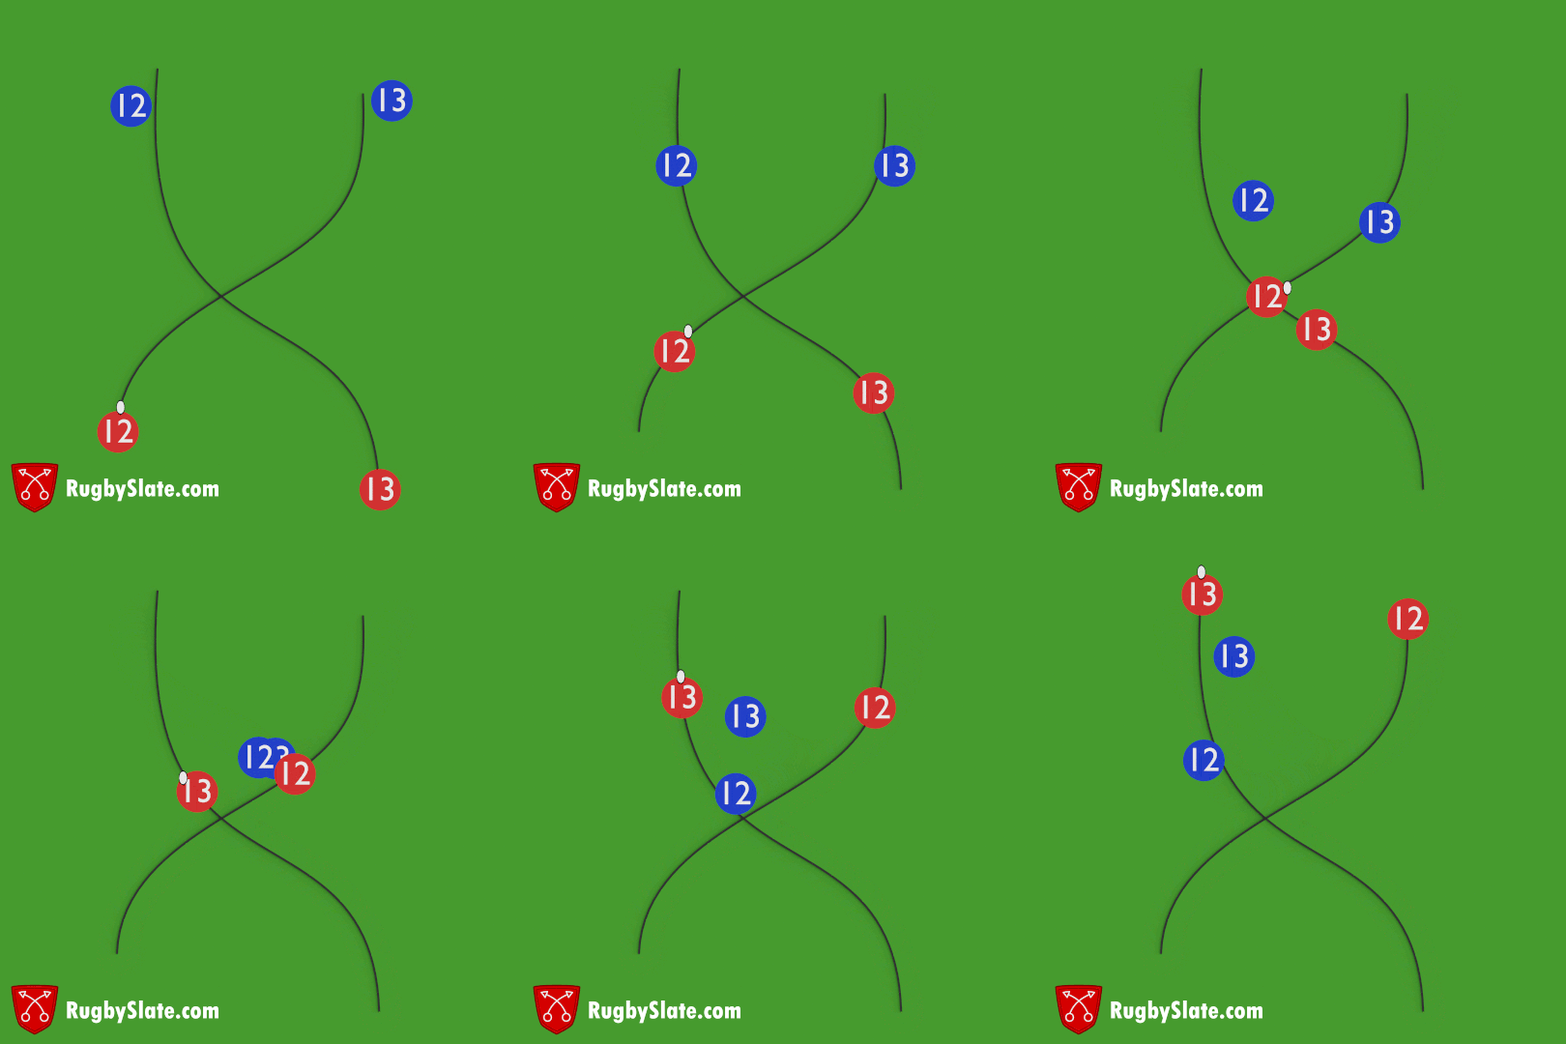
A switch is one of the most basic rugby moves. The player with the ball and another attacking player run at an angle to cross paths and the ball is passed at the point they meet.
This shows a switch being used to turn a 2-on-2 situation into a line-break. The key to this is drawing the two defending players together, causing large gaps to appear either side of them, which can be exploited. The lines must be run at a high speed and near to the defensive line to ensure that the defenders aren’t able to read the play early or change direction quickly enough to tackle the incoming runner. In this particular instance, the defensive 12 is the player of interest as they should be responsible for defending against the attacking 12, and once the players have switched, defending against the attack 13. This is discussed in more depth below.
In the case above, a center switch is being shown but the switch can be utilized anywhere on the field, between any players. A good application of the switch is when getting short on space towards the touch line where the attacking team is being pushed outwards. The example below shows a covering defender (11), drifting across covering both the 15 and the 14 by pressing them towards the touchline. The switch cuts behind the defender and releases the attacking 14 to attack the space and avoid being tackled in to touch.
The final thing to consider is the “dummy” option, where if both the defending players both try to pre-empt the move and cover the runner cutting the line. In this situation the ball carrier should just keep the ball and exploit the newly opened gap.
The switch is a fundamental move in rugby and is used as a building block for more complex backs moves. It is also very common for it to be used with forwards as the runner cutting a line back against the play. This is because they are more likely to be a dangerous running threat, therefore drawing the attention on the defence to cause a mistake in the defence (like the example above) or can be used to “crash” the ball in and potentially break through a tackle.
Defending
Defending a switch can be relatively simple if the defenders are aware of it happening so that they can react accordingly. The key to defending against a switch is to simple stay in the correct channels and not get drawn to following the ball or the player initially being marked. Below is an example of how to correctly defend against a switch, the defending channels have been marked to show how each defender is responsible for their own channel and “swap” which player they are tackling once they cross over.
The switch should be one of the first moves to be mastered by a player; it is simple, effective and teaches important skills. The switch requires a player to have positional awareness, good timing and the ability to read the defence, all of this is extremely helpful to have on the rugby field regardless of position or skill level. A large number of more advanced and complex back’s moves require a switch to be run so it is a key ingredient to being able to progress as a backline player.


